Showing posts with label Tutorial. Show all posts

Friday, March 11, 2011

Physical Care Tips (Hardware) Mobile Model Touch Screen / Touchscreen


Today I will give you a few tips from my own experience about how to care for a touchscreen mobile phone model since I use this model phone with the use of more than 1 year and remains smooth and silky 90%. Because treatment hape this model is not the same as treatment with a phone keypad and the qwerty model due to the pressure sensitive screen allows for more leverage how to treat them. Then use the stylus that are less fit can cause phone display cepet beret-beret and burem.
More details, please refer to my tips as follows:

1) Give ScreenGuard. These tips are important when purchasing a new or second hand phone, directly sajabelikan screenguard because despite anticipated touchscreen tetep scratch resistant screen just in time they are beret-beret. lucky if just beret, if it not burem unsightly. So my advice these tips do first because the screen is in direct contact with a finger or stylus.

2) Give Safety Gloves. Once given screenguard, it's time to give protector for body hape. Most of the touchscreen phone can not arbitrarily change the casing as the old nokia types because the casing in direct contact with components such as mobile phone screen, keypad board, etc.. I've posted a problem I membokar casing 5230 and seems horrified. Since I can tutorial from nokia5230.net either not practicing. Atut ... : D

3) Telungkupkan Hape. Well this is the most important in my opinion is when the phone is not used try and get used telungkupkan phone wherever and whenever (wew. ...) because the screen is sensitive to the pressure effect. Can not you imagine if phone is placed on the floor and then keinjek our feet. Not to mention that something fell from above either stones, food, drinks etc.. If ditelungkupkan we still can postpone death hape us if something happens: D

4) Speaker. Do not set the song because of its frequency with high volume is set as though it could tetep ngeprek aka voice over dose. If it is so we also do a regret.

5) Dikantongin. Be careful if we want mengantongin jeans type pants hape because it could create pressure on the phone and cause a slightly curved screen. Even should mengantongin try screen or surface facing into the instance so we bump into something like a table and right about our phone pocket, our mobile phone still safe because the hit was rear casing. So, once more we delay the death of our mobile phone: D

6) Pressing the screen. Try not to press the screen too hard. I recommend giving vibrate or tone to the touch screen, its usefulness is to know that we touch screen is what has not worked with a little soft touch: p Usually the phone screen has been a miscarriage of the rainbow or any part of the screen burem or another color that does not fit with the image ( TV bleak if hit magnet ...) it signifies something the screen never depressed.

7) Stylus. Reduce the use of this tool, although the stylus mengbuat we use the phone looks cool: D but do not dech, not as smooth as smooth-smooth stylus our hands ehe ..........

8) Magnet. Avoid direct contact with the electronic goods such as TV, Radio, Computers, etc. that contain magnets because it can affect the electron wave (bener yak times ..) on the screen.

9) USB to a computer. Do not be too open close the USB in my phone dech Ntar like the lid off because its frequency step on to the company. If loose Ntar perforated and looks charming and beautiful again: D yah forced the glue Alt * co (Sensor)

10) Important, Keep away from children under age. Can not think why not be yourself.

Up here before tips from me and have me practice (pastinya. ..) if there is new I'll try the update and if there are tips from readers and gentlemen, please allow me happy to add these tips and tricks as you think with comments below because my goal here is to share rather than patronizing.

last word, good luck:)

Monday, February 28, 2011

How To Change / Changing Fonts Nokia s60v5 (5233,5230,5530,5800, X6, C6, N97/Mini)

In March of this flavor-taste pengen posting a tutorial problem, understand posting ginian mood again so kalo udah gk 1 month mood might only have 10 posts doang:)
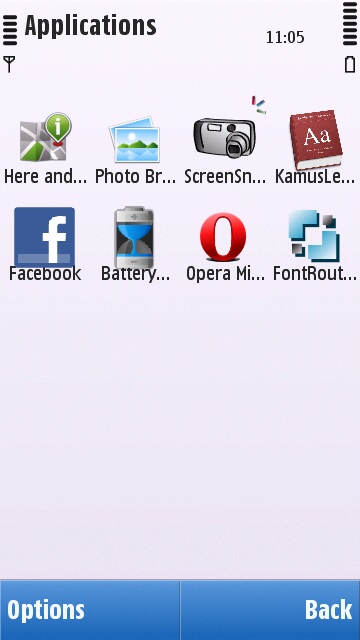
Okay, here I give a little tutorial how to change the font on s60v5 series phone using Fontrouter applications. Why should use Fontrouter? Because this application is very easy to use, features and application of many fonts is very easy. But why still there is trouble use this application? Maybe I load fonts that do not understand and also need to restart the phone to change those fonts. Actually a lot of applications that provide services such as Flipfont Dll replacement font, there is also a method of Copas but less efficient because they can not change the font size and complicated to change font-menggonta another. So I suggest really use Fontrouter (not a promo lho ..) For those who do not have Fontrouter can be downloaded HERE and the font can be downloaded HERE.


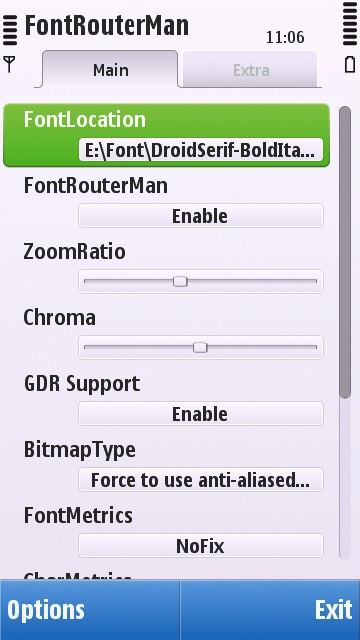
Just click "FontLocation"


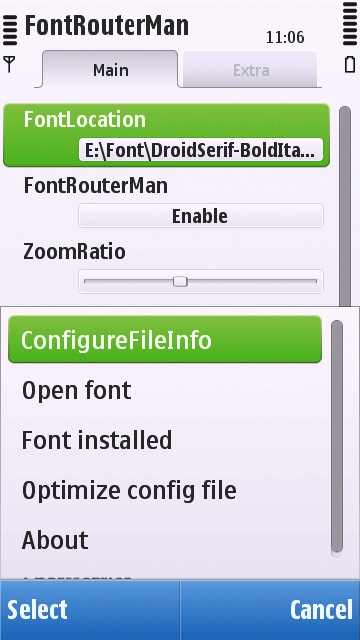
then select "Options" select "Open Font"


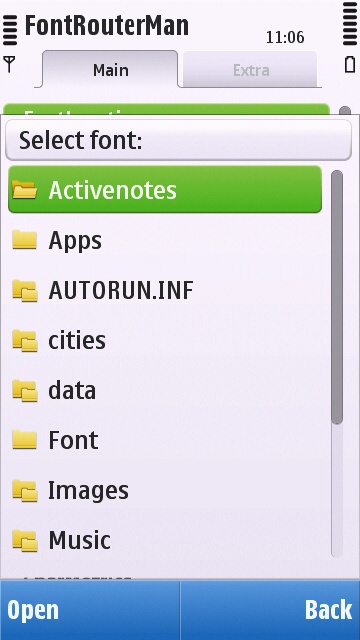
Find a font where you saved the font types. Putting up where but if you can in the main folder so that search easier.


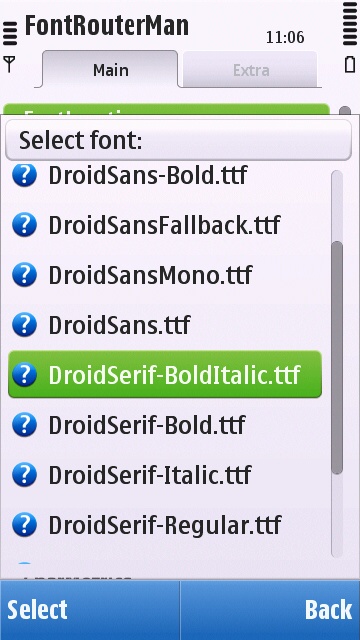
Select the font you want to replace the original font. I am here using the font from the writings of the Android model:)


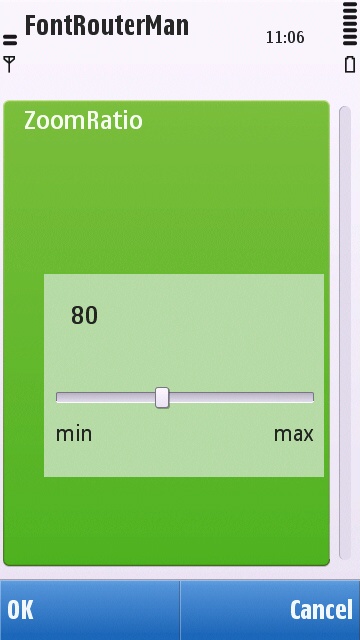
Then I changed to 80 because ZoomRatio to decrease the font size looked big and not let the pile-pile.


If already do not forget the restart. Do not forget the RESTART! to apply these fonts.

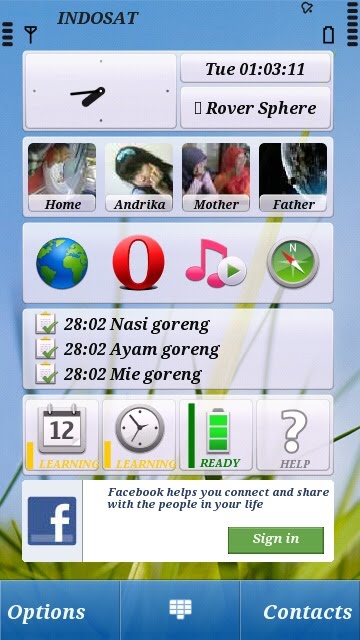
Tada ................ already so it's easy dech? live load-restart is finished. To change the other fonts the same way as the first step above. Now to restore the original fonts stay disabled Fontorouter then Restart. So every change the font to be restarted yes. The result is like this ..........


If still unclear please comment below yes:)

Sunday, December 5, 2010

[Remake] Tutorial How To Hack Nokia 5230 V20 and above (Beginning to End)


Perhaps the readers of the blog "s60v5 lover" a new, slightly confused or even not at all mudeng hape how to make 5230 a hackable as they may lack follow this blog from the beginning to the tar-up to date:) Okay I will therefore review the way make this type hape be hackable with a tutorial from the beginning to the phone ready to be installed a variety of interesting applications.

Immediately, please download the tools first flashingnya below:
JAF V1.98.65
JAF Virtual PKEY v4
PC Suite (if already there have to be installed again gk)
------------------------------------------------------------------------------------------------------------------


If so, download the Original FW 21 for 5230 Original firmware v21 for 5230 (hackable)


Download: click here
------------------------------------------------------------------------------------------------------------------


okay, we've had to download firmware 5230 FW21, so make hape have all of you who still FW10, FW11, FW12 or FW20 FW21 will automatically be because the most was up to date and there has been little renewal.

Now go to the step flashing.

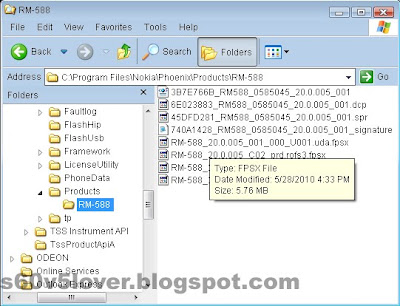
1. Place the FW files to C: \ Program Files \ Nokia \ Phoenix \ Products \ RM-588. if phoenix/RM-588 folder does not exist, please make your own folders with appropriate names above.
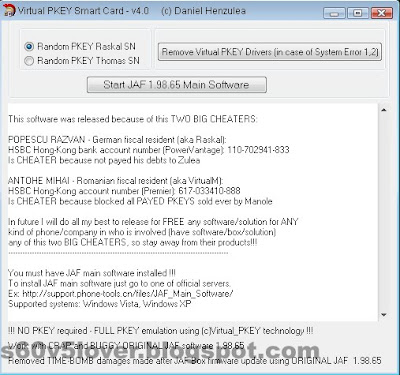
2. Run a virtual P-key and then click Start JAF v4

3. If there is written "No Box Detected" Click OK. But if it says "Dongle etc ...." means you are using the latest Virtual PKEY. I therefore recommend using V4.


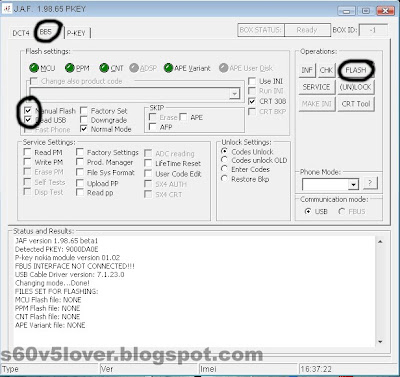
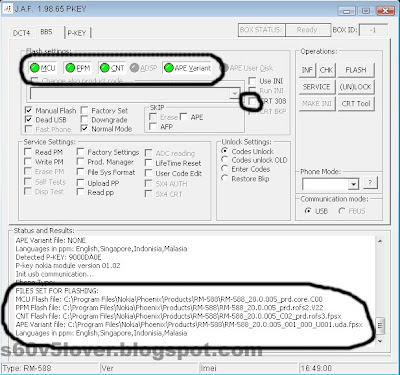
4. Select and check Manual BB5 Dead USB flash and shown below.


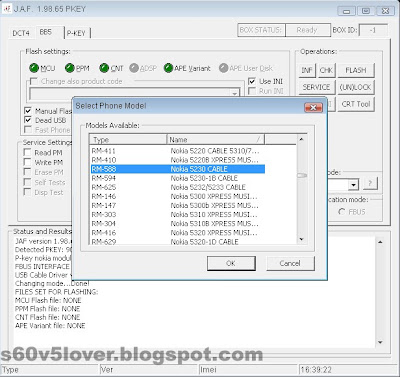
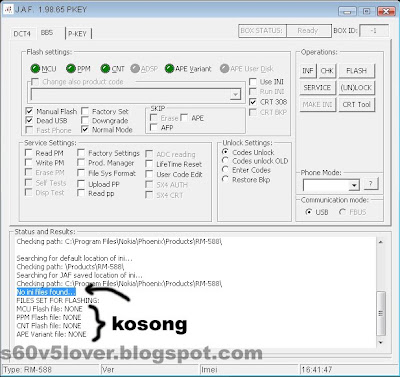
5. PROCESS uploading. Check "Use IT" to appear Phone model selection. Select RM-588.


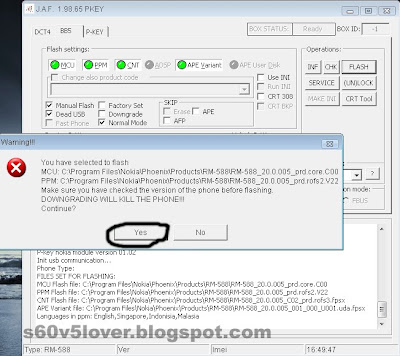
6. Select Yes to start the installation.


7. But not a few others in the case of uploading said that when selecting "SELECT PHONE MODEL" JAF does not read the contents FIRMWARE that is in the folder "Phoenix-Products-RM-588" as shown below.


8. Do not worry, there are still ways that can be done manually. First open the folder "Program Files-Nokia-Phoenix-Products-RM-588"


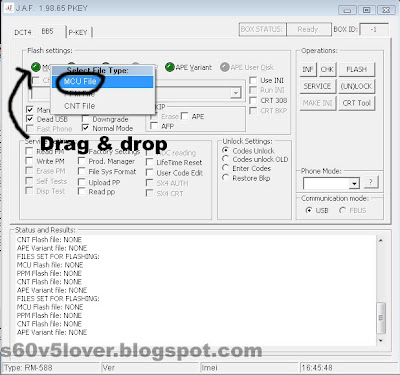
9. Make Drag & Drop as shown below. But remember not to enter the wrong file, such as:

- "MCU" for files ending in "C00"

- "PPM" for files ending in "V22"

- "CNT" for files ending in "ROFS3.FPSX" and

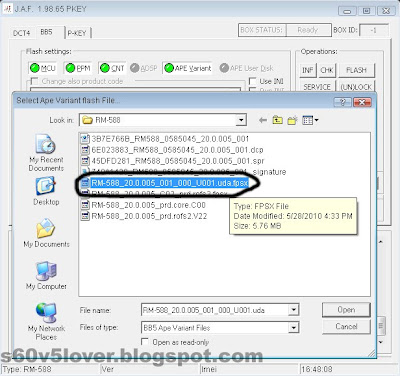
- APE variant "for files ending in" UDA.FPSX "

Remember, do not let one ......:)

- Do I click and hold RM-588_20.0.005_prd.core.C00 then place the front button and select the MCU MCU writing. Remember the "MCU" for files ending in "C00" like the picture.


10. Proceed as above with the next file. Special "APE Variant" how to enter the file by pressing the green button APE Variant. Then select the file "UDA.FPSX"


11. If all files have been placed according to their places the file type buttons have been colored green and the status explained that the files have been filled. Do not forget to check the CRT 308.


12. After that plug the phone in a state of death
13. Click the flash, will display WARNING and press YES.
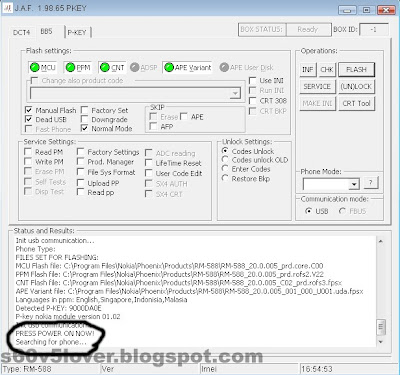
14. Wait until there is written "Searching for phone".


15. Press the ON / OFF Phone 1 second and release.
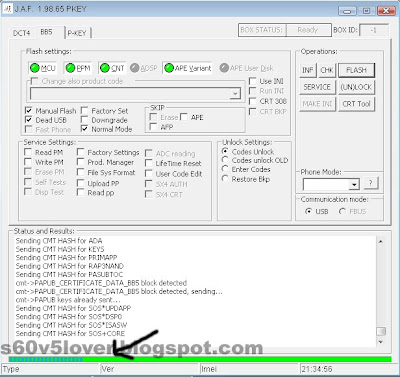
16. If successful then the status will read "Phone Found" and the flashing process ensued.
17. If you do not succeed, do not be dizzy. Perform step number 13 over and over again until JAF find connections between JAF and Phone. (Recommended to install the PC Suite for JAF easily recognize when the search telephone connectivity)
18. Wait until there is a warning to disconnect the telephone.


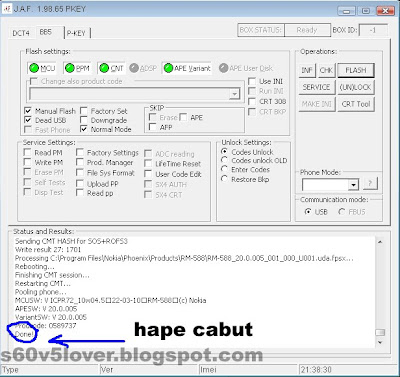
19. Disconnect the telephone connection after lettered DONE!
20. Usually after lettered Done! The phone will turn on automatically. If not, remove the battery and plug back in and turn.
21. Then grab a glass of Ice Orange drink, and enjoy your FW21: D

================ Do not be afraid to try: D ===================

For phone type 5233, 5228 and 5235 the same way to the stage flashing only loosely replaced in accordance with the type of phone.

Learn How to Incorporate language in CFW with Nokia Editor v0.2

After a long wait with CFW C6/N97 full version for 5230 that do not arise from PNHT.org jg-appear, then I love aja dech tutorial for inserting / adding language to the CFW that may want to include other foreign languages such as Arabic, Chinese etc.. Fairly long tutorial hell, yes than not there are posted better tell the agan2 are still confused insert language into the CFW. But for those who have advanced tooling-utek CFW, skip aja This tutorial is okay:)

Immediately to the scene. This is a short tutorial on how to import a language file using the NFE v0.2.
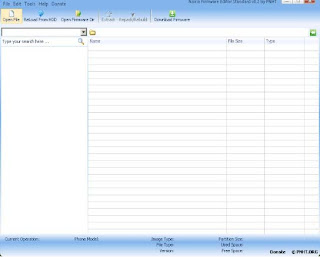
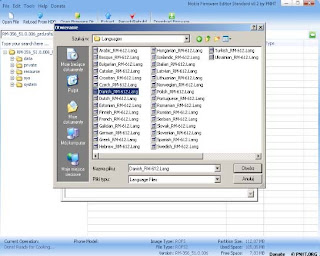
1. Nokia editor then run the application on the front display click "open file"
Click image for full size


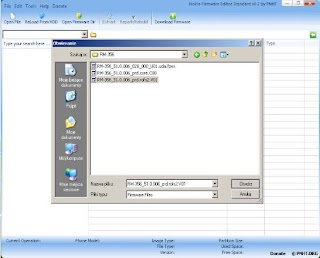
2. Select file ROFS2


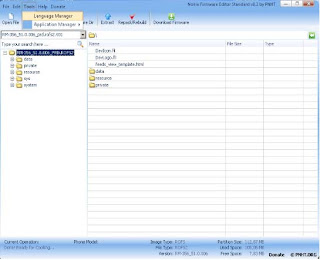
4. Click tool-Language Manager


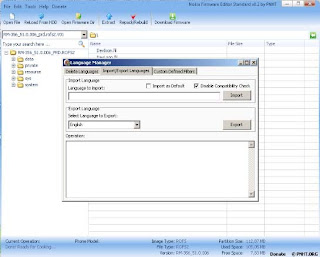
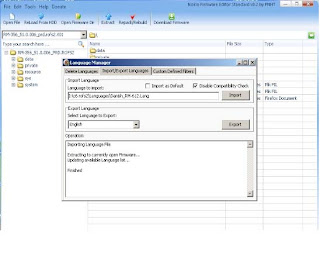
5. TAB Select the Import / Export Languages


6. Go to language that is stored in the PC


7. Language will be automatically Extracted.


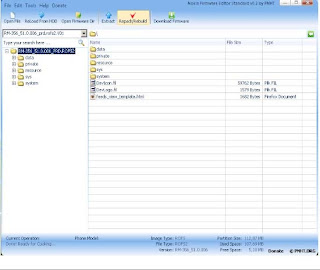
8. If so, repack / Rebuild to mengepack file into a file ROFS2


9. Wait for the process of repack with a glass of hot tea ....

10. Done. Please enjoy the fried CFW made your own.
Thanks

Saturday, December 4, 2010

Tutorial Hack Nokia s60v5 (5230,5530,5800,x6,n97/mini)

Surely you s60v5 users sometimes have problems when installing an application where both games and applications are the message has expired license (certificate expired) or problematic application (application unsigned). It's perfectly natural when you've just bought hape (especially purchasing a new phone) because all are still original. once you hack your phone for good. But remember when you hard reset, your phone automatically terHack no longer, then input it back Cer and Key. I recommend to keep the Cer and Key that you created for Cer and Key is not the same as other phone because the registration time to use your phone a personal IMEI.

Ok here I'll just give a tutorial for you all who have problems like the above. Note: Safe software for mobile phone and does not eliminate the warranty.

Foremost you have to prepare applications and FreeSigner HelloOX, you can download below for those who do not have both.

To get Cer and Key I suggest through this arena OPDA famous site fast in serving the certificate request.

1. After entering the site OPDA, you go directly to register for a not yet have an account.


2. Please register and fill out the empty columns.


3. After successful registration, login now and then immediately go to my certificate,

4. Click Apply to request cer and key


5. Enter your request including your IMEI number, how to know the IMEI number, type * # 06 # on your smartphone.


6. Done. Cer and Key hape you have been so special. now live download Cer and Key in the rightmost column as shown below.


If KUALA LUMPUR and Key can not download, then wait for about 2 hours, then went to the site OPDA again, then login and then to MY CERTIFICATE Download as step 6.

Ok, now entering the stage through the Free Phone Hacking Signer. (Create a new folder on the memory card with the name "Asigned")

1. Signer free install as usual. Once inside select "Options" and then setting


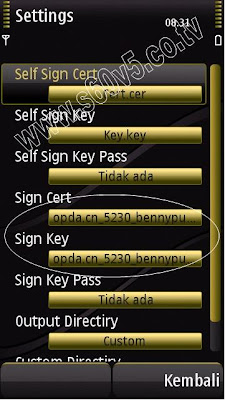
2. Enter "KUALA LUMPUR" which was downloaded to the box "Sign Cert"
3. Enter "Key" that was downloaded to the box "Sign Key". In directiry output change to "Custom" and change it to Custom directiry "Asigned" (folders that we created earlier) Asigned point directory that is when an application that we have hacked (unsigned applications to be signed) is in the directory, for easy file search .


4. Now we will install the application HelloOX. Open freesigner then "Add Task" enter HelloOX files already stored on your phone.


5. After HelloOX on add, select "Options" then "Go!"
6. Done. Eitzz ..... but this is done in stages mengUnsigned HelloOX file. Continue ......
7. Now open the folder "Asigned" and install HelloOX which has been Signed.
8. Once installed open HelloOX and Hack process ensued. It takes a few minutes, after finished, Exit from HelloOX.

9. Now open ROMPatcher +. ROMPather already exists automatically when the process is complete Hack.

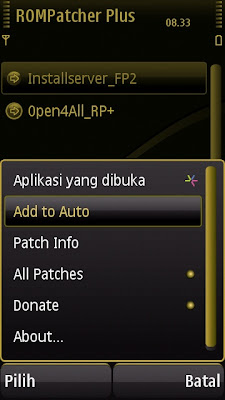
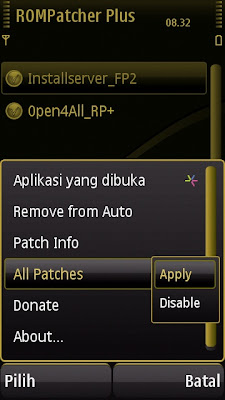
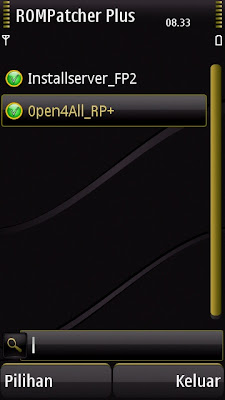
10. Now the "Options" select "add to Auto". gituin both yes. Then "Options" again "All Patches-Apply".


So the picture as below


Huahmm ......... So then, congratulations your phone is in hack

Tutorial Downgrading Nokia Firmware S60V5


The core of this tutorial is how to do the flashing in this downgrading on nokia cell phone without using any hardware flasher. Like the FW21 on the nokia 5230 in donwgrading become FW20. But there is still a risk of failure in the process of flashing.


What is needed in this tutorial is flashing software (in this case JAF), built-in data cable, a software emulator that can emulate hardware flasher box before, and your courage to do the flashing.

Seaman whatever the means used to make modifications to the Flash ROM there is still a risk that will arise as brick on your mobile phone.

Without a wide winded again below is the tutorial step by step to perform downgrading the firmware nokia:


4) Run the program JAF, Select BB5 tab.
In the section Flash settings, check the options that you want to do in this case downgrade the firmware, then check the box downgrade
and uncheck the box normal
In the Operation section, click the INF and CHK
In Phone Mode section, click the tab? (Question mark)

6) After the firmware and your phone mode is identified, click on the section Operation FLASH tab to do the flashing process

7) Wait for the flashing process that runs automatically until finished (done), then you have succeeded in flashing on your mobile phone


Note:
Install Nokia Flashing Cable Driver and Nokia Service Tool Drivers advance if JAF can not detect your phone


Disclaimer:

Any risk posed by the use of this tutorial and everything in it
borne by each user.
Related Posts Plugin for WordPress, Blogger...